5 Scaling
Scaling
- SCALE MEASUREMENT
- FULL SIZE
- HALF SIZE
- QUARTER SIZE
The ability to make accurate measurements is a basic skill needed by everyone who reads and uses blueprints. This section is intended as a review of the fundamental principles of measurement. Since some students have had little need to measure accurately, these exercises will provide the practice they need. Others, who have had more experience, may find these exercises a worthwhile review.
Whether or not you need to review these fundamentals, there is one important thing to remember about getting measurements from a print. If you need a dimension that is unclear or is not given, do not measure the print! Since prints shrink, stretch, and may not be drawn to scale, you can easily come up with some very inaccurate dimensions.
Scale Measurement
A drawing of an object may be the same size as the object (full size), or it may be larger or smaller than the object. In mo.st cases, if it is not drawn full size, the drawing is made smaller than the object. This is done primarily for the convenience of the users of the drawings. After all, who wants to carry around a full size drawing of a locomotive? Obviously, with an object as small as a wristwatch, it would be necessary to draw to a larger scale.
A machine part, for example, may be half the size (1/2”=1”); a building may be drawn 1/48 size (1/4”=1’-0”); a map may be drawn 1/200 size (1”=100’-0”); and a gear in that wristwatch may be ten-times size (10”=1”).
There are numerous scales for different needs. Since each occupational group has their own frequently used scales, some practice or basics review will help you to work with the scales used in your technology.
Full Scale
Full scale is simply letting one inch on a ruler, steel rule, or draftsman’s scale equal one inch on the actual object. Rules of this kind are usually divided into 1 /16” or 1 /32” units. The first measurement exercise will be with full size. If you can measure accurately in full scale, you may want to skip ahead.
Here is a “big Inch”. Each space equals 1/32”. If you have not worked with accurate measurement, spend some time studying it.
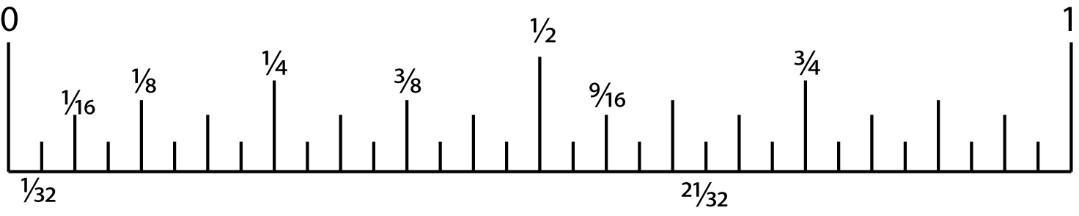
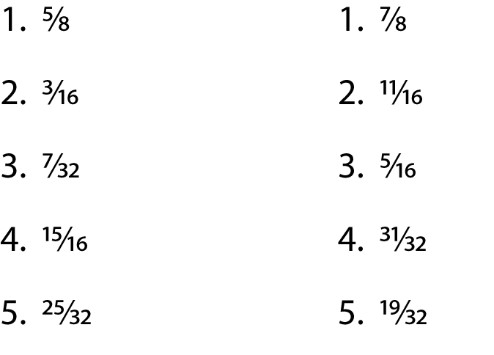
Measurement practice: on the scale above, locate the following fractions:
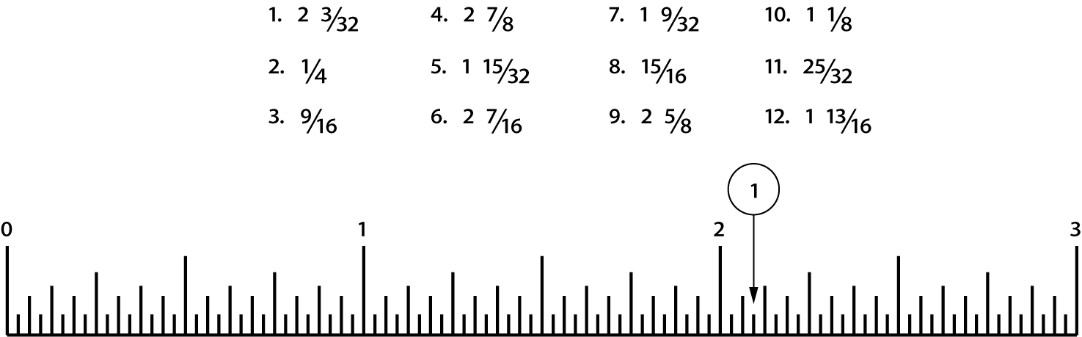
Directions:
Each of the fractions below is numbered. Write that number above the scale and point with an arrow where the fraction is located. Number 1 has been completed.
Half Size
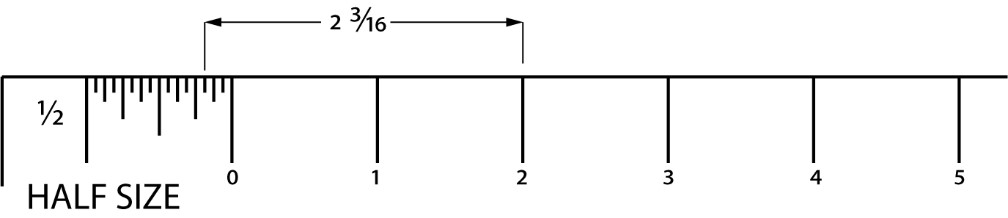
The principle of half size measurements on a drawing is simply letting a unit, such as 1/2” on the scale, represent a larger unit such as 1” on the drawing. If the drawing is properly labeled, the words HALF SIZE or 1/2″= 1′ will appear in the title block.
Using the half-size scale is not difficult, but it does take some practice. To measure a distance of 2-3/16” you look first for the 2, then go backwards to the zero and count off another 3/16. You measure this way for each dimension that has a fraction. Whole numbers (numbers without fractions) are measured in the usual way.
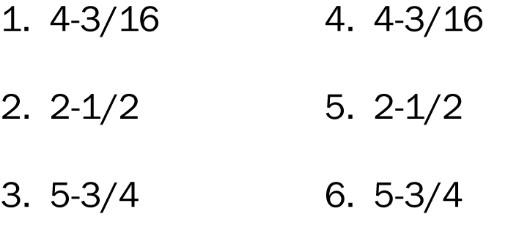
Next, locate a half size scale (available in the lab) and measure the lines· below to the nearest 1 /32 of an inch. Write the length of the line in the space provided.
Because paper is dimensionally unstable due to humidity, exact answers to this half size measurement practice cannot be given. That is another reminder that it’s poor practice to measure from a piece of paper.
Quarter Size
Quarter size is used and read in a similar way to half size except that each unit, such as a quarter of an inch, represents a larger unit, such as one inch. If the drawing is properly labeled the words QUARTER SIZE, QUARTER.SCALE, or 1/4″ = 1″ will appear in the title block.
The quarter size scale is used in a similar manner as the half size scale.
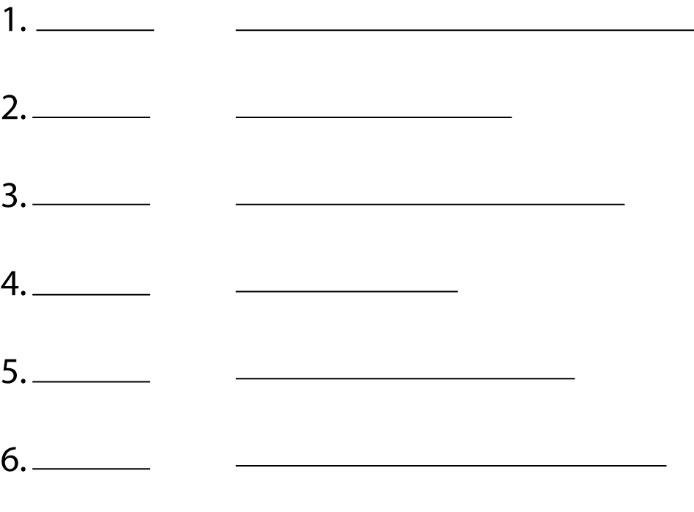
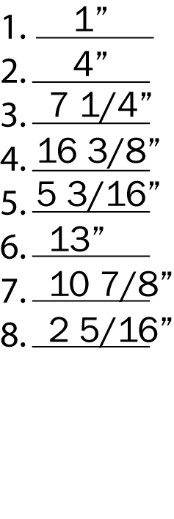
For quarter size practice, draw lines in the area provided to the required length. Have another student or the lab instructor check your lines for accuracy. (A ¼”=1” scale is available in the lab.)
Quiz
For this quiz, you will be given an object to measure with a ruler or tape measure. You will record measurements in full scale and then draw each length in ½ and ¼ scale.
